This Is How We... Generated Realistic Terrain

Hello Loyal Followers!
This marks the start of a new series of explanatory blog posts revealing some of our development process. In this first post, we'll explain how we created the terrain for Ghost of the Forest. A huge thank you to Alexey and Dillon for sharing this information!
Here is the base height map exported out of that chunk:

We went through a lot of testing with Rahul; he even made his own separate map based on the previous design and tested that as well.
World Machine Flow:

After wards, the terrain was slightly modified with the landscape tools by Rahul, Alexey, and Dillon.

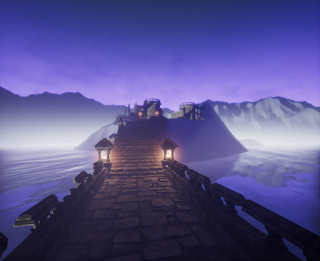
Once the entire scene was dressed, the final tweaking stage went into effect. We added fog and lighting to the deep forest to give it a beautiful and realistic touch. Although the environment is complete, the tweaking is still taking place to make the player feel like they are exploring a true Canadian forest.

As always, we appreciate your support!Heightmap
Alexey found an atlas rendering of the Canadian Rocky Mountains, set an area to nowaday's Alberta province, and then used Photoshop to turn that into a heightmap.Here is the base height map exported out of that chunk:
We went through a lot of testing with Rahul; he even made his own separate map based on the previous design and tested that as well.
World Machine
Using the previous heightmap export from the main reference image, Alexey used World Machine to customize the flow to fit our needs. In the image below, the blue is outlining nodes that produce the final heightmap used to generate the game's terrain.World Machine Flow:
After wards, the terrain was slightly modified with the landscape tools by Rahul, Alexey, and Dillon.
Dressing
After the final heightmap was rendered in World Machine, we uploaded the map into Unreal Engine. Using brushes, Dillon painted the map to add vegetation and grass to the environment. Once the entire map was painted, it was time to start dressing the scene with Trees and growth. This process took about two weeks to get the environment to feel realistic and natural.Once the entire scene was dressed, the final tweaking stage went into effect. We added fog and lighting to the deep forest to give it a beautiful and realistic touch. Although the environment is complete, the tweaking is still taking place to make the player feel like they are exploring a true Canadian forest.
- Amanda, Legendary Minutes Team


Comments
Post a Comment